Titrations
Titrations date back to the mid 18th century as a classic technique of finding the concentration of a solution. The lab starts with two solutions, one that has a known concentration and one that has an unknown one. The lab involves adding a measured amount of one of the solutions into a solution that has a specific quantity. These two solutions will react and solution one will continue to be added until the reaction is complete. The goal is to find the concentration of the unknown solution. In other words titrations are the process of adding a molarity of an acid to a molarity of a base in order to attempt to neutralize the chemicals and find the concentration of the solutions. From this basic principal allows for a lab to take place as following:
Materials:
Materials:
- A 50 ml graduated Burette (picture 1)
- Burette clamp (picture 2)
- 50 ml of an unknown base
- 50 ml of an unknown acid
- 3 100 ml graduated beakers (picture 3)
- 1 100 ml graduated flask (picture 4)
- 1 10 ml glass pipette (picture 5)
- 1 plastic pipette filler (picture 6)
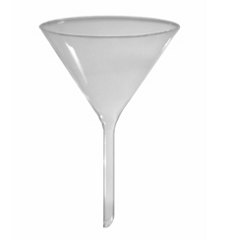
- Funnel (picture 7)
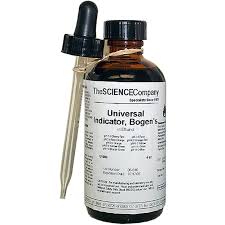
- 15 drops of universal indicator (picture 8)
- Plastic pipette (picture 9)
- Pencil

|

|
Picture 1 Picture 2

Picture 3
|

Picture 4
|

|

|
Picture 5 Picture 6
Picture 7

Picture 9
|
Picture 8
|
Procedure:
- Write with the pencil on one of the beakers acid and the other base. Then pour the 50 ml of acid into a graduated beaker and the 50 ml of base into its graduated beaker.
- Begin by putting the burette into the burette clamp with about 3 or 4 centimeters between the tip of the burette and the table. (figure 1) And then put the third beaker under the end of the burette to act as a waste bucket.
- Place 1 cc of acid into the burette and turn on the faucet of the burette in order to ensure that the burette is fully functioning and then pour the acid from the waste beaker back into the acid beaker.
- Place the funnel into the opening of the burette and the pour 3 cc of the acid into the burette.
- Next go to the sink and swirl around the acid inside of the burette by moving the burette in a circular motion and then pour out the acid into the sink when the burette is sufficiently coated with acid on the walls of the burette.
- Then use the pipette and the pipette pump to take 1o cc of the base. One uses the pipette and its pump by placing the pipette into the opening of the pup, which is at the bottom that looks like the cap of a toothpaste bottle. Once securely placed into the pump, place the pipette into the base and start moving the circular level towards the sky until the burette is filled to the point where the pipette indicates 10 cc. Then dump out the base, as one is trying to coat the pipette with the base before starting the experiment.
- Next, pour all of the 50 ml of acid into the burette through the funnel and record its placement in the burette by looking at the meniscus.
- Then use the pipette to suck up 10 cc again but this time place the end of the pipette on the bottom of the flask, while making sure the pipette stays on the bottom of the flask and not hitting the sides, in order to ensure that all of the base is being accounted for.
- Use the plastic pipette to release three drops of the universal indicator into the base in order for the chemical to turn purple.
- Next, place the flask under the nozzle of the burette so that the opening is in the direct center,
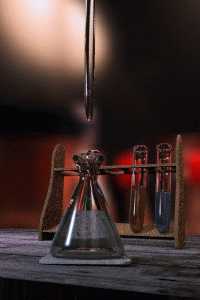
- Then begin to slowing allow the acid to drop into the base while the flask is being stirred. Stop the flow of the liquid once the base turns clear again. (See figure 2)
- Record the new volume of acid after the trial and calculate the titration by subtracting the original volume of the acid to the new one.
- Wash out the flask with water but it is not necessary to dry it. Then complete steps 8-10.
- Whatever the result of this titration is, take 20% of the number. Subtract this number from the titration from the last trial. Once that number is found, one will do another trial but this time the acid will be released freely for 80% of the way. Then one will drip the acid slowly after 80% of the expected acid has been released. Close the burette when the liquid turns clear again.
- Record the new volume of the acid and subtract that from the original volume of this trial.
- Repeat steps 13-15 4 more times to complete the lab.

|
|
Figure 1 Figure 2
Figure 2 above shows how one can tell when the titration lab has completed. The lab is completed when the solution turns clear again, once enough acid has been added into the base to create a neutral solution. Titrations are important because they allow scientists to learn the identity and strength of solution. Titrations are used for scientists to learn an unknown concentration of a chemical. This is an important lab because there are many circumstances where solutions can get confused and so there is an easy way to find the concentration of the unknown solution. All in all it possesses an extremely important job in society.
